Lifestyle
How to Fix "Cannot Take Photo" iPhone Problem
09 • 12 • 2014
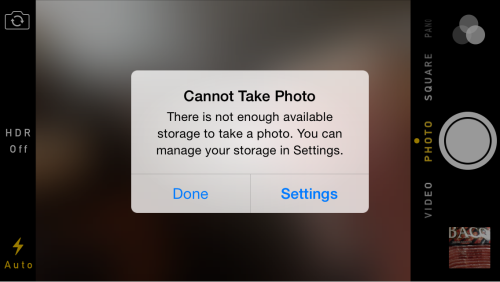
Imagine this: your children are being angelic, you have idyllic scenery that you want to humble-brag to your FB/Insta friends about, so you whip out your iPhone to snap a pic, and it says “Cannot Take Photo; Manage Your Storage in Settings.” NOOOOOOO! So you try to delete a few photos, or you may go to Settings and pay $10 to add more storage, but it still doesn’t fix the problem. This has happened to me and I have seen it happen to friends on numerous occasions. So here are step-by-step instructions on how to fix the Cannot Take Photo iPhone problem:
I realize this is a beauty blog, but I believe this post to be marginally relevant as I want to make sure you have enough room on your iPhone to download the BeautyNow app for booking spa/salon appointments throughout the U.S.
I am 99% sure that your problem is with your photos and videos. Here’s the deal: you want photos you take on your iPhone to sync with/be backed up on your home computer as soon as you get back home to your WIFI. BUT you don’t want it synced the opposite direction, i.e. all the photos and videos that are on your computer do NOT need to be syncing to your iPhone.
A lot of people mistakenly assume this storage issue can be fixed from your iPhone. Under Settings > iCloud> Photos you get to this screen:
Yes, you will free up phone storage if you unclick the green button for “My Photo Stream.” The problem is that this will prevent your iPhone photos from being synced to your computer when you are on WIFI. I personally want all the photos I take on my phone during the day to be backed up on my computer. I just don’t want everything on my computer to be synced to my phone.
Instead, here are the steps you should follow:
1) You have to physically PLUG IN your iPhone to your computer. Take your white charger thingy apart to where it is a USB and you can plug it into your computer. iTunes will probably automatically open up on your computer. If not, launch iTunes.
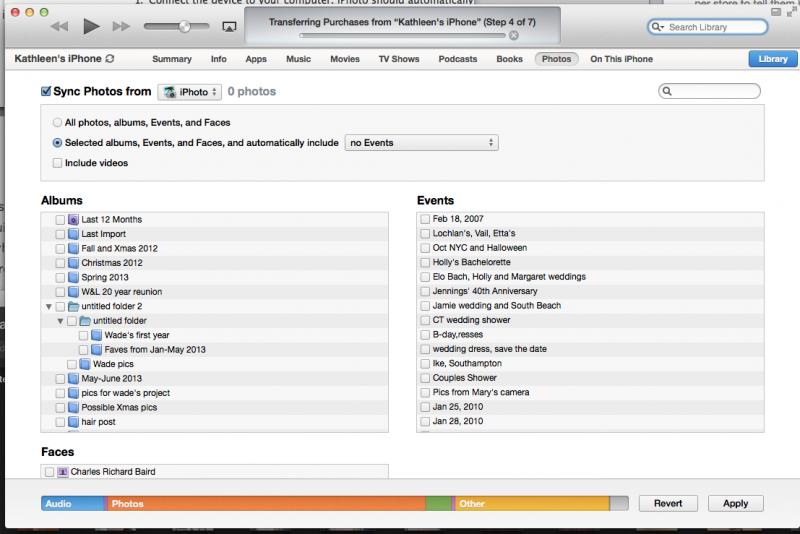
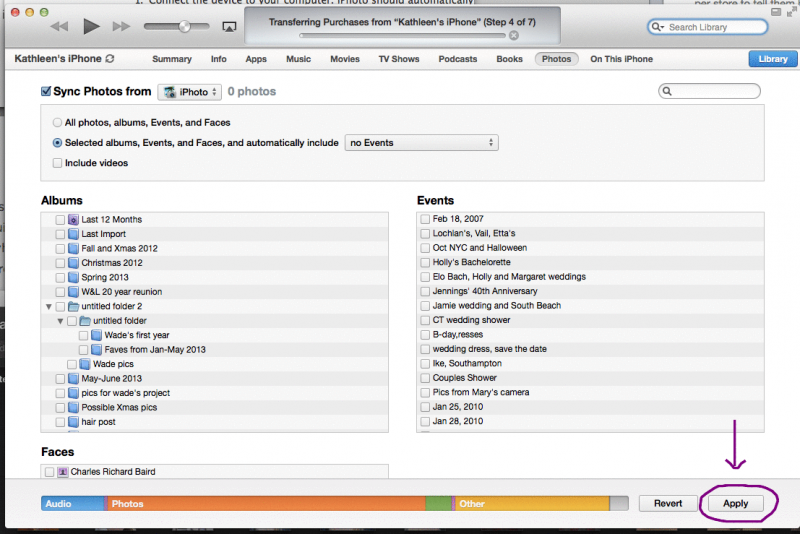
2) In iTunes, this screen should appear:
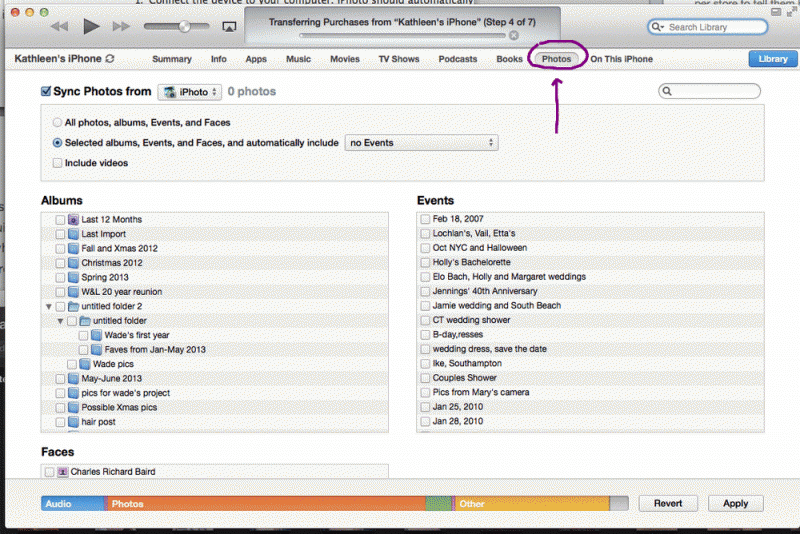
3) On the bar toward the top of the page, click on the ‘Photos’ tab:
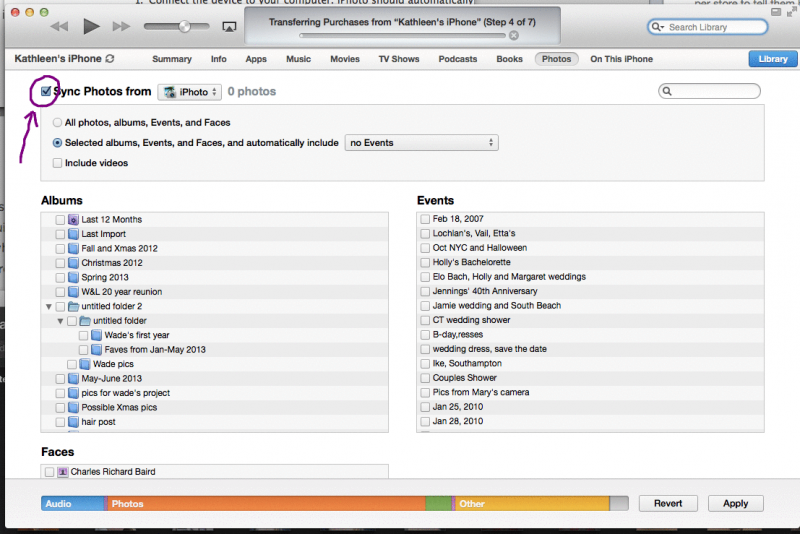
4) UN-check the box next to ‘Sync Photos from iPhoto’:
5) At the bottom of the page, click ‘Apply’:
6) The computer will spin for a while and go through about 6 steps transferring files, copying files. It probably takes about 7 minutes. When the wheel next to the ‘Kathleen’s iPhone’ stops spinning, the orange bar at the bottom that shows you how much storage the Photos take up should be smaller.
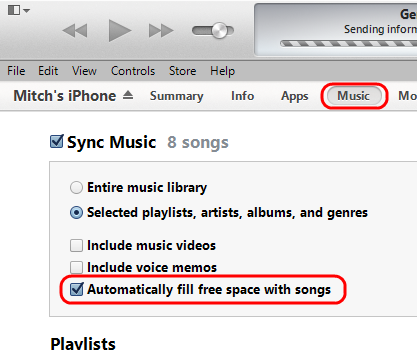
7) While you’re at it, click on the ‘Music’ tab and make sure you are being selective about the tunes you keep on your iPhone- you don’t need your whole iTunes library in your pocket! For me, I make sure I only sync “Selected artists, albums, genres” so when my boys play with my iPhone they can only listen to Classical and Toddler music and not Mommy’s Nine Inch Nails and gangsta rap. Also make sure ‘Automatically Fill Free Space With Songs” is UN-checked. Why should that even be an option, Apple??
Now there’s no excuse not to have the BeautyNow app on your iPhone. Oh, and BeautyNow is available on Android too!
xoxo,
@beautynowapp











Hi there,
Latest rumours indicates that the coming app Planky ( getplanky.com )
have shown great test results in compressing your Iphone photos. I
follow them on Facebook and have seen some rather impressive results.
They can free up to 95% storage space by their compressing app. Set to
be launched in January 2016. I have signed up on their web to get
notification on launch.
Best Thomas