Makeup
In-Between Makeup Routine
04 • 01 • 2022

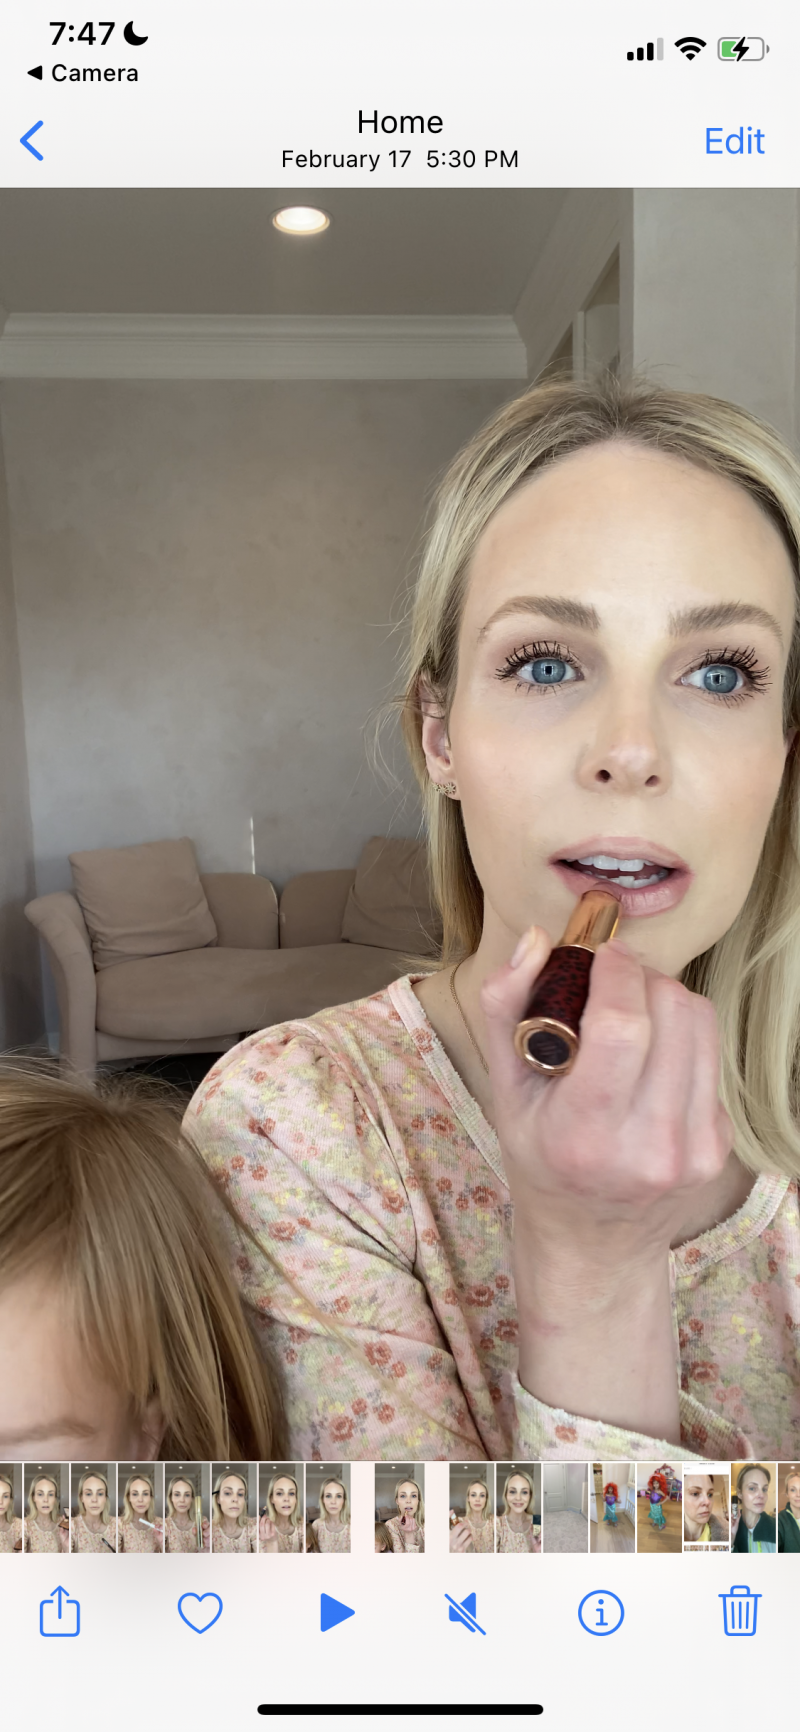
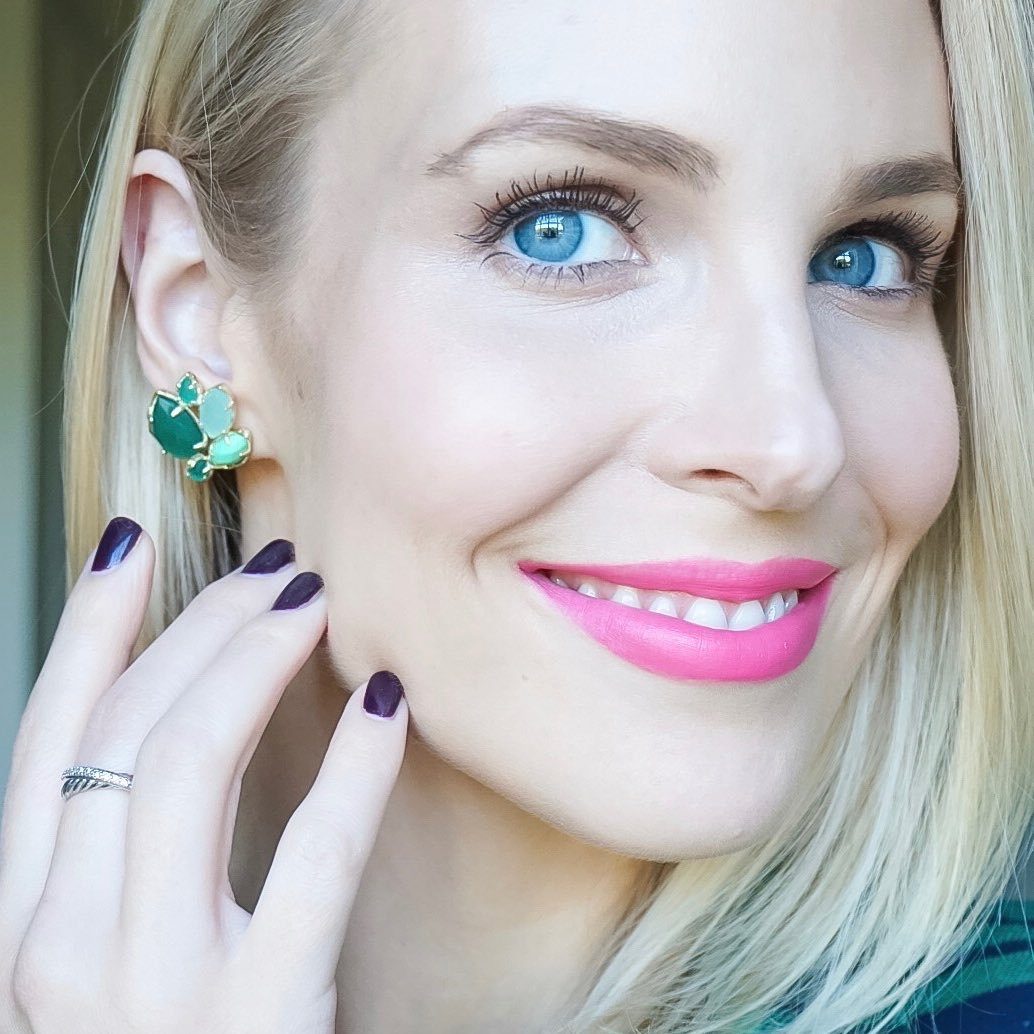
The other day when I posted my Nars Light Reflecting Foundation review I got a lot of requests to do a tutorial about my full makeup look. I call this an “In-Between Makeup Look” because it is more fancy than your everyday carpool look, but not dramatic event makeup. Watch my Instagram Reel {linked below} to see how I apply, or read all the details below. This post is sponsored by Nordstrom, but I chose the products to feature and bought the products with my own money.

Watch My Video
Here is a link to my Instagram Reels video where I show application of all the products:
https://www.instagram.com/reel/CbyeeIyAE0o/?utm_source=ig_web_copy_link
Products I Used

Primer- I have tried the Nars Light Reflecting Foundation with several different primers and it has worked well with all them. Most often I use it with my “quick and dirty” primer- the Too Faced Hangover spray primer. No other primer is this quick and fuss-free! The primer helps blur pores and makes the foundation last even longer.
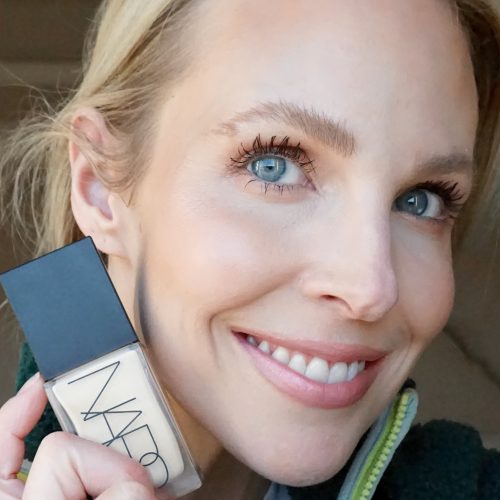
Foundation- The Nars Light Reflecting Foundation (in the video I used shade Gobi) is superior to other luxury foundations I’ve tried because it goes on so effortlessly. Many good foundations have perfected that “second skin” finish, but I find them difficult or time-consuming to blend out. With the Nars, I put about 1.5 pumps on my fingers and then dot on my t-zone areas and under eyes. Then I blend out with my fingers from there. If you want to add more coverage, the formula layers and builds nicely.

After I smooth out with my fingers, I use a damp Beauty Blender to bounce around any areas that look thick to make it meld with my skin. I also make sure to blend out any harsh lines around the sideburn area, hairline or jawline.
Setting Powder- After applying the foundation I have been setting with the Charlotte Tilbury Airbrush Flawless Finish Pressed Powder (in Fair) with the Hourglass Double-Ended Veil Powder Brush. This brush is so handy to travel with because it can do it all- powder, bronzer, blush, and highlighter. Make sure you bounce the fluffy brush up and down instead of wiping because it will disturb the foundation underneath.
The Nars foundation alone covers up a great deal of imperfections, but if I still see under-eye dark circles peeking through, I dab on Nars Radiant Creamy Concealer (shade Vanilla) with my ringfinger. Also I didn’t use it in this video, but I have also really been liking the new Nars Creamy Corrector (in Light). Use it before concealer to cancel out the blue undertones of dark circles.
Bronzer- I absolutely love the Charlotte Tilbury Airbrush Bronzer (shade Tan). It has incredible weartime and is completely shimmer-free, so it works very well for contouring. I also use it in the crease of my eyelids to create depth and dimension.
Brows- I love the Charlotte Tilbury Brow Cheat in Taupe (full review here). Brush the brow hairs straight up with Lancome Sourcils Styler Brow Gel (I use shade Blonde) for that “laminated brow” look that is so hot right now.
Lashes- Lancome Cils Booster Lash Primer followed by Hourglass Unlocked Mascara.
Eyeshadow- Charlotte Tilbury Luxury Eyeshadow Palette in Pillow Talk
Lips- I overlined my lips (mostly just going straight across my Cupid’s Bow) with Charlotte Tilbury Lip Cheat in Pillow Talk (the cult fave nude pink that works on everyone!) and then filled in with Hot Lips 2 Lipstick in Angel Alessandra.
Setting Spray- Set everything with a few quick spritzes of the Charlotte Tilbury Flawless Finish Setting Spray.
xoxo,


Leave a Reply